Metal Roof Installation: Complete Step-by-Step Guide (2026)

Shocking Industry Truth
Considering a metal roof installation for your home? Metal roofing has surged in popularity, now representing over 17% of the residential roofing market—up from just 4% a decade ago. And for good reason: metal roofs last 40-70 years, withstand 140+ mph winds, and can reduce cooling costs by 25%.
But metal roof installation is fundamentally different from installing asphalt shingles. The process requires specialized tools, different fastening techniques, and careful attention to thermal expansion. Done wrong, you'll face leaks, oil canning, and premature failure.
This comprehensive guide covers everything about metal roof installation: the step-by-step process, DIY vs professional considerations, tools required, common mistakes, and what to expect on installation day. Whether you're a homeowner planning a project or researching what to expect, this guide will give you the knowledge you need. Also see our metal roofing pros and cons guide, our best metal roofing materials for coastal SC, and our complete standing seam guide. Ready for a professional installation? Schedule a free inspection.
Ready to Protect Your Investment?
Schedule your free roof inspection today. No obligations, just peace of mind.
Types of Metal Roofing Systems
Before diving into installation, it's essential to understand the main types of metal roofing systems. Each has different installation requirements:
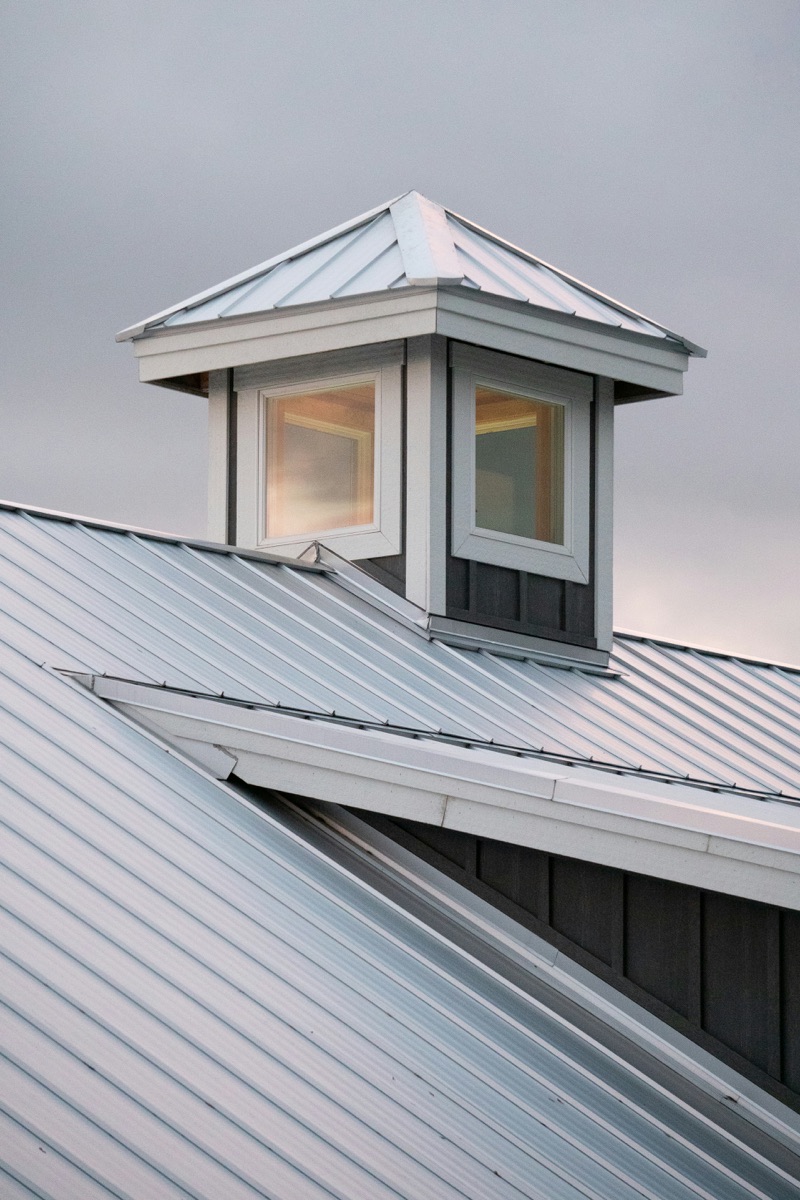
Standing Seam Metal Roofing
Standing seam is the premium metal roofing option, featuring raised seams that connect panels and hide fasteners.
- Appearance: Clean, modern lines with vertical seams
- Fasteners: Concealed (no exposed screws)
- Installation: Most complex, requires specialized tools
- Cost: Premium investment — highest among metal options
- Best for: Modern homes, high-end applications, coastal areas
- Lifespan: 50-70 years with proper installation
Corrugated Metal Roofing
Classic wavy or ribbed panels, popular for agricultural buildings and now trendy for modern residential applications.
- Appearance: Wavy or ribbed pattern, industrial aesthetic
- Fasteners: Exposed (visible screws)
- Installation: Simplest metal roofing to install
- Cost: Most affordable metal option
- Best for: Sheds, barns, modern farmhouse styles, budget-conscious projects
- Lifespan: 40-60 years
Metal Shingles
Metal panels stamped to resemble traditional roofing materials like shingles, slate, or wood shake.
- Appearance: Mimics asphalt, slate, or wood shake
- Fasteners: Concealed interlocking system
- Installation: Moderate complexity
- Cost: Mid-range metal option
- Best for: HOA-restricted areas, traditional-style homes
- Lifespan: 40-60 years
R-Panel / PBR Panel
Commercial-grade panels with trapezoidal ribs, commonly used on commercial buildings but gaining residential popularity.
- Appearance: Clean lines with trapezoidal ridges
- Fasteners: Exposed through-fastened
- Installation: Relatively straightforward
- Cost: Budget to mid-range commercial option
- Best for: Commercial buildings, metal buildings, cost-effective residential
- Lifespan: 40-50 years
Metal Roofing Materials: Which Metal Is Best?
Metal roofing comes in several material options, each with different properties, lifespans, and price points:
| Material | Lifespan | Relative Cost | Best For |
|---|---|---|---|
| Galvanized Steel | 40-60 years | Most affordable | Budget-friendly, inland areas |
| Galvalume Steel | 50-60 years | Budget to mid-range | Better corrosion resistance |
| Aluminum | 50-70 years | Mid-range to premium | Coastal areas (salt-resistant) |
| Copper | 70-100+ years | Premium | Historic homes, premium applications |
| Zinc | 80-100 years | Premium | Self-healing, architectural |
Coastal South Carolina Recommendation
For Myrtle Beach and the Grand Strand, we strongly recommend aluminum or Galvalume steel with PVDF coating. Standard galvanized steel can corrode within 10-15 years due to salt air exposure. The additional cost of aluminum pays for itself in longevity and reduced maintenance.
Paint/Coating Systems
The coating system protects the metal and determines color longevity:
- PVDF (Kynar 500/Hylar 5000): Premium coating, 30-40 year color warranty, best UV and chalk resistance
- SMP (Silicone-Modified Polyester): Mid-range, 20-25 year warranty, good value
- Polyester: Budget option, 10-15 year warranty, fades faster
Pro Tip: Don't Skimp on Coating
The coating system affects appearance more than the metal itself. A steel roof with PVDF coating will look better after 30 years than aluminum with polyester coating. For South Carolina's intense UV exposure, PVDF is worth the investment.
Preparation Before Metal Roof Installation
Proper preparation is critical for a successful metal roof installation. Here's what needs to happen before the first panel goes up:
Step 1: Roof Deck Inspection and Repair
The roof deck (typically plywood or OSB sheathing) must be:
- Structurally sound: No rot, delamination, or soft spots
- Flat: Warped or uneven areas will telegraph through metal panels
- Properly nailed: Loose sheathing must be resecured
- Correct thickness: Minimum 7/16" OSB or 15/32" plywood recommended
Critical: Never Install Over Damage
Metal roofing will not hide deck problems—it will highlight them. Any waviness, dips, or imperfections in the deck will be visible in the finished roof. Replace damaged decking before installation.
Step 2: Remove Existing Roofing (If Applicable)
Metal roofing can sometimes be installed over existing shingles, but removal is often better:
When You Can Install Over Shingles:
- Only one existing layer of shingles
- Shingles are relatively flat (no curling)
- No underlying deck damage
- Local codes permit it
- Using batten/purlin system
When You Must Remove:
- Multiple shingle layers
- Any signs of deck damage
- Curled or buckled shingles
- Installing standing seam
- Warranty requirements
Step 3: Install Underlayment
Underlayment provides a secondary water barrier and prevents direct metal-to-deck contact:
- Synthetic underlayment: Required for most metal roof installations (30# felt is NOT recommended)
- High-temp synthetic: For metal roofing, use underlayment rated for 240°F+ (metal gets hot)
- Ice & water shield: Required at eaves, valleys, and penetrations in cold climates
- Slip sheet: Some metal roofs require a slip sheet between underlayment and metal
Underlayment Installation Tips
- • Overlap seams minimum 4" horizontally, 6" vertically
- • Use cap nails, not staples (metal roof movement can pull through staples)
- • Work from bottom up, parallel to eaves
- • Extend underlayment over drip edge, NOT under
Step 4: Install Drip Edge and Starter Trim
Metal-specific trim components go on before panels:
- Eave trim/drip edge: Channels water into gutters
- Gable trim/rake edge: Finishes roof edges
- Valley flashing: Pre-formed or fabricated for valley areas
- Ridge cap base: Some systems require pre-installed components
Tools and Materials Needed
Metal roof installation requires specialized tools beyond standard roofing equipment. Here's what you'll need:
Essential Tools
Cutting Tools
- Electric metal shears (nibblers)
- Aviation snips (left, right, straight)
- Circular saw with metal-cutting blade
- Angle grinder (use sparingly)
- Turbo shear attachment for drill
Fastening Tools
- Impact driver (NOT impact wrench)
- Screw gun with depth adjustment
- Pop rivet gun
- Seam crimper/seamer (standing seam)
- Hand seamers/tongs
Measuring & Layout
- Tape measure (25'+ recommended)
- Chalk line
- Speed square
- Torpedo level
- Laser level (helpful but optional)
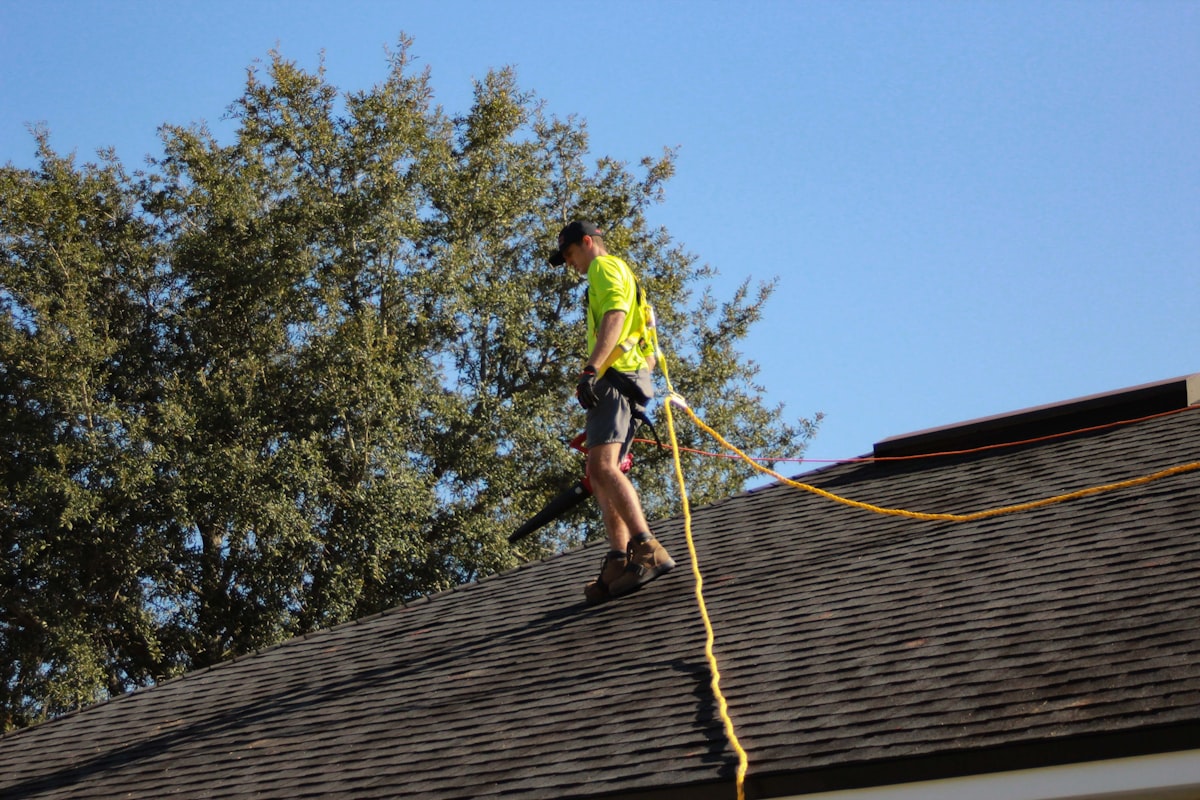
Safety Equipment
- Fall protection (harness, ropes, anchors)
- Cut-resistant gloves
- Safety glasses with side shields
- Hearing protection
- Knee pads
- Non-slip footwear
Never Use These to Cut Metal Roofing:
- Abrasive chop saws: Throw hot sparks that burn the coating and cause rust spots
- Angle grinders (excessive use): Same problem—sparks damage coating for 6"+ around cuts
- Circular saws with abrasive blades: Use metal-cutting blades only, and run saw backwards
Materials Checklist
- Metal panels: Order 10-15% extra for cuts and waste
- Trim pieces: Eave, gable, ridge, transition, valley
- Fasteners: Panel screws, trim screws, pop rivets
- Sealant: Use manufacturer-approved sealant only
- Underlayment: High-temp synthetic (30# felt NOT recommended)
- Butyl tape: For sealing trim to panels
- Pipe boots: Sized for plumbing vents
- Touch-up paint: Matches panel color for scratches
Order All Materials at Once
Metal panels are manufactured in batches with slight color variations. Ordering all panels at once ensures color consistency. If you run short, panels from a different batch may not match.
Step-by-Step Metal Roof Installation Process
With preparation complete, here's the actual panel installation process:
Step 1: Establish Starting Point
Metal roofing installation starts at one end of the roof and works across:
- Wind direction: Start on the side opposite prevailing winds so overlaps face away from wind
- Square check: Measure diagonals to ensure roof is square—adjust if necessary
- Reference line: Snap a chalk line parallel to the eave, set back 1-2" for overhang
- Panel orientation: First panel overlapping edge faces away from starting corner
Step 2: Install First Panel
- Position panel at starting corner, aligning with reference line
- Ensure proper overhang at eave (typically 1-2" past drip edge)
- Check that panel is perfectly perpendicular to eave—this is critical
- Install first fasteners at center of panel, working outward
- For exposed fastener panels, drive screws into flat areas (not ribs)
- Apply consistent pressure—fastener should be snug, not over-driven
The #1 Mistake: First Panel Not Square
If the first panel isn't perfectly perpendicular to the eave, every subsequent panel will compound the error. By the time you reach the other end of the roof, you could be inches off. Take extra time to get the first panel perfect.
Step 3: Continue Panel Installation
Work across the roof, overlapping panels:
- Overlap direction: Each panel overlaps the previous one (usually one rib)
- Seam sealing: Apply sealant in overlapping seam per manufacturer instructions
- Alignment check: Every 3-4 panels, verify alignment with eave
- Fastener pattern: Follow manufacturer's recommended spacing (typically 12-24" on center)
- Thermal expansion: Don't over-drive fasteners—allow slight panel movement
Step 4: Cut Final Panels to Fit
The last panel in each row usually needs cutting:
- Measure carefully—account for trim overlap
- Use electric shears or nibblers for clean cuts
- File any sharp edges
- Apply touch-up paint to cut edges to prevent rust
Step 5: Install Flashing and Transitions
Flashing is critical for waterproofing transitions:
Sidewall Flashing
Where roof meets vertical wall, install step flashing or continuous flashing extending 4"+ up wall and under siding.
Headwall Flashing
Where roof terminates at upper wall, install kick-out flashing and counter-flashing under siding.
Pipe Boots
Use metal or high-quality EPDM pipe boots sized for each penetration. Seal with manufacturer-approved sealant.
Valley Installation
Open valleys with pre-formed valley flashing, or closed valleys with panels trimmed to meet at centerline.
Step 6: Install Ridge Cap
Ridge cap is the final step, covering the roof peak:
- Install ridge vent if required for ventilation
- Apply closure strips or foam sealant at panel-to-ridge transition
- Install ridge cap starting opposite prevailing wind
- Overlap ridge cap sections 6"+ with sealant in overlaps
- Fasten through caps into structural framing when possible
Standing Seam: Special Installation Considerations
Standing seam metal roofing has a different installation process than exposed-fastener panels. Here's what's unique:
Clip Attachment System
Standing seam panels attach via clips, not screws through the panel:
- Fixed clips: Used at eaves and ridge—lock panel in place
- Floating clips: Used mid-panel—allow thermal expansion/contraction
- Clip spacing: Typically 12-24" on center per manufacturer specs
- Fasteners: Clips attach to deck with screws—panels never get screwed
Why Clips Matter
A 20' metal panel can expand/contract 1/4" or more with temperature changes. Fixed fasteners would eventually wallow out the holes and leak. The clip system allows panels to "float" while remaining weathertight.
Seaming Process
Standing seam panels connect via interlocking seams that get crimped together:
Mechanical Seam (Field-Locked)
Seams are crimped with electric or hand seamers on-site. Options include single-lock (90°) or double-lock (180°) seams. Double-lock provides superior weather resistance but requires a mechanical seamer.
Snap-Lock Seam
Panels snap together without mechanical seaming—easier but less weather-resistant. Not recommended for low-slope applications or coastal areas.
Specialized Equipment Required
- Electric seamer: For field-locked seams (specialized expensive equipment)
- Hand seamers: For detail work around penetrations and edges
- Panel notcher: For cutting panel ends
- Hem tool: For creating panel end hems
- Portable panel former: Some contractors form panels on-site
Standing Seam: Not a DIY Project
Standing seam installation requires expensive specialized equipment and significant training. Even experienced general contractors hire standing seam specialists. This is not a weekend DIY project.
Flashing Around Penetrations: Pipes, Chimneys, Skylights, and Vents
In our experience, the single biggest source of metal roof leaks is not the panels themselves — it's where the panels meet penetrations. Every pipe, chimney, skylight, and vent that passes through your roof creates a potential leak point that demands meticulous flashing work. I've been called out to fix more "leaky metal roofs" caused by bad flashing than any other issue.
Pipe Boot Flashing
Plumbing vents are the most common roof penetration. For metal roofs, standard asphalt-roof pipe boots won't work — you need boots designed for metal:
- Material: Use EPDM rubber or silicone pipe boots rated for metal roofing temperatures (up to 400°F on dark panels in South Carolina sun)
- Sizing: The boot must fit snugly around the pipe — a 3" pipe needs a 3" boot, not a 4" with sealant filling the gap
- Installation: Cut the metal panel to fit around the pipe with 1/2" clearance, slide the boot over the pipe, and seal the base flange to the panel with butyl tape and screws
- Common mistake: Using a universal boot trimmed to size — these degrade faster than purpose-molded boots
Chimney Flashing: Step and Counter Flashing
Chimneys are the most complex penetration to flash properly on a metal roof. You need two layers of protection:
Step Flashing (Lower Layer)
Individual L-shaped pieces of metal, each overlapping the one below by at least 2 inches. Step flashing tucks under panels on the uphill side and lays against the chimney. Each piece should extend at least 4 inches up the chimney and 4 inches onto the roof surface. Use the same metal as your panels to avoid galvanic corrosion.
Counter Flashing (Upper Layer)
A continuous piece set into the chimney mortar joint (reglet) that folds down over the step flashing. This creates a two-layer system where water running down the chimney hits the counter flashing first and drains over the step flashing below. Never rely on sealant alone — mechanical engagement in the mortar joint is essential.
Cricket / Saddle (Uphill Side)
Any chimney wider than 30 inches needs a cricket — a small peaked diverter on the uphill side that prevents water and debris from pooling behind the chimney. South Carolina building code (IRC R903.2.2) requires crickets on chimneys over 30 inches wide. Skipping this is a guaranteed future leak.
Skylight Flashing
Skylights on metal roofs need custom-fabricated curb flashing kits. What I see on every job where a skylight leaks:
- Uphill side: A diverter (mini cricket) above the skylight curb to channel water around it
- Sides: Step flashing running the full length of the curb, with panels cut to follow the curb line
- Downhill side: An apron flashing that extends at least 8 inches past the curb onto the panels below
- Sealant: Butyl tape under all flashing-to-metal joints, plus a bead of polyurethane sealant on top as a secondary barrier
Valley Flashing
Valleys concentrate water flow, making them high-risk leak areas. Two methods are used:
Open Valley
- Pre-formed W-valley flashing visible between panels
- Panels stop 3-4 inches from centerline
- Better for high-volume water flow
- Easier to inspect and maintain
- Recommended for coastal SC
Closed Valley
- Panels trimmed to meet at valley center
- Cleaner appearance
- Higher leak risk if not executed perfectly
- Harder to maintain and inspect
- Not recommended for high-rainfall areas
Common Flashing Mistakes We Fix
- Using dissimilar metals: Aluminum flashing on steel panels (or vice versa) causes galvanic corrosion — use matching metals
- Relying on sealant alone: Sealant is a secondary barrier, not a primary one. Mechanical overlaps must shed water by gravity first
- Insufficient overlap: Flashing overlaps under 4 inches can allow wind-driven rain underneath
- Forgetting thermal movement: Flashing must allow panels to expand and contract without breaking the seal
- Reusing old flashing: When replacing a roof, always install new flashing — old flashing is already fatigued
Ventilation Requirements for Metal Roofs
One of the most overlooked aspects of metal roof installation is ventilation. I can't tell you how many times we've been called to a "leaking" metal roof only to find the real problem is condensation from inadequate ventilation. Here in the Myrtle Beach area, where humidity regularly exceeds 80%, proper ventilation isn't optional — it's critical.
Why Metal Roofs Need Ventilation
Metal is a thermal conductor, which means it heats up fast and cools down fast. When warm, moisture-laden air from inside your home hits the cool underside of a metal roof, condensation forms — just like water droplets on a cold glass. Without ventilation to carry that moisture away, you get:
- Deck rot: Persistent moisture breaks down OSB and plywood sheathing from above
- Mold growth: Dark, moist spaces under the roof become mold breeding grounds
- Insulation damage: Wet insulation loses R-value and can compress permanently
- Fastener corrosion: Condensation on fastener points can cause premature rust, even on coated screws
- Ice damming (in cold climates): Though less of a concern in SC, uneven roof temperatures cause ice buildup
Types of Ventilation for Metal Roofs
| Ventilation Type | Location | Function | Best For |
|---|---|---|---|
| Soffit Vents | Under eaves | Intake — draws cool air in | All metal roof installations |
| Ridge Vents | Along roof peak | Exhaust — lets hot air escape | Primary exhaust for most roofs |
| Off-Ridge Vents | Near ridge, on roof slope | Exhaust — alternative to ridge vents | Hip roofs without continuous ridge |
| Powered Attic Vents | Roof slope or gable | Active exhaust via fan | High humidity areas, complex rooflines |
| Gable Vents | Gable-end walls | Cross-ventilation | Supplemental only, not primary |
Code Requirements: IRC R806
The International Residential Code (IRC) Section R806 governs attic ventilation and applies to metal roofs in South Carolina:
Minimum Ventilation Ratio
- 1:150 ratio: 1 square foot of net free vent area for every 150 square feet of attic floor — this is the default
- 1:300 ratio: Allowed if 50-80% of ventilation is in the upper portion of the attic (near ridge) and a Class I or II vapor retarder is installed on the warm side
- Balanced system: Split ventilation roughly 50/50 between intake (soffit) and exhaust (ridge) for optimal airflow
- Never mix exhaust types: Don't combine ridge vents with powered vents — the powered vent can short-circuit the ridge vent
Coastal Humidity: Myrtle Beach Considerations
In Myrtle Beach and the Grand Strand, ventilation is especially critical. Our average relative humidity hovers around 73% year-round, with summer months regularly exceeding 85%. What I recommend for every coastal metal roof installation:
- Exceed code minimums: I recommend 1:100 ventilation ratio in coastal SC rather than code-minimum 1:150 — the extra airflow handles our humidity
- Continuous soffit vents: Individual soffit vents can't keep up. Use continuous perforated soffit panels for maximum intake
- Above-deck ventilation gap: A 1" airspace between metal panels and underlayment using battens or ventilation strips reduces condensation dramatically
- Vapor barriers: In our climate zone, install a vapor retarder on the conditioned (warm) side of ceiling insulation to prevent interior moisture from reaching the attic
Ventilation and Energy Efficiency
Proper ventilation works hand-in-hand with metal roofing's energy benefits:
- Summer cooling: Ridge and soffit ventilation moves hot air out of the attic, reducing cooling loads by up to 30% when combined with metal's reflective properties
- Radiant barrier synergy: Metal roofing plus a radiant barrier in the attic plus proper ventilation is the most efficient roof assembly for South Carolina's climate
- Lifespan extension: Ventilated metal roofs experience less thermal cycling stress on fasteners and sealants, extending the functional life of every component
Pro Tip: Check Existing Ventilation Before Installing
Before any metal roof goes on, we inspect the existing attic ventilation. Many older Myrtle Beach homes have inadequate soffit vents or painted-over gable vents. Upgrading ventilation during a roof replacement is far easier and cheaper than coming back later. If your soffit vents are blocked by insulation, install baffles to maintain the air channel.
Installing Metal Roofing Over Existing Shingles: When It Works and When It Doesn't
One of the most common questions homeowners ask me is whether they can install metal roofing directly over their existing asphalt shingles. The short answer: sometimes yes, sometimes absolutely not. Getting this decision wrong can cost you thousands and void your warranty. Here's how to decide.
When Overlay Installation Works
Metal-over-shingle installations can work well under the right conditions:
Conditions for Successful Overlay
- Single layer only: Only one existing layer of shingles — no exceptions
- Flat shingles: Existing shingles are lying flat with no curling, buckling, or lifting
- Sound deck: No soft spots, sagging, or signs of moisture damage beneath
- Code compliance: South Carolina building code (IRC R907.3) allows re-roofing over one layer of existing roof covering — maximum two total layers
- Weight capacity: The roof structure can handle the added weight (metal panels weigh 1-1.5 lbs/sq ft, plus the existing shingles at 2-3 lbs/sq ft)
- Batten/purlin system: You install furring strips or purlins over the shingles to create a flat, level surface and ventilation gap
When Tear-Off Is Required
Situations That Demand Complete Removal
- Two existing layers: Building code prohibits more than two total roof coverings. If you already have two layers, everything comes off
- Deck damage suspected: Any signs of sagging, soft spots, or water stains in the attic mean the deck needs inspection. You can't inspect it through shingles
- Curled or buckled shingles: Uneven surfaces telegraph through metal panels, causing an unprofessional appearance and potential fastening issues
- Standing seam installation: Most standing seam manufacturers require installation on a clean, flat deck — not over shingles
- Manufacturer warranty requirements: Some metal roofing warranties are voided if installed over existing materials. Always check first
- Moss, algae, or moisture: Any biological growth suggests trapped moisture that will only get worse when sealed under metal
Overlay vs. Tear-Off: Comparison
| Factor | Overlay | Complete Tear-Off |
|---|---|---|
| Cost | Lower — saves labor and disposal fees | Higher — adds 1-2 days of labor plus disposal |
| Timeline | Faster — skip tear-off day | Longer — add 1 day for removal |
| Deck Inspection | Not possible — deck hidden | Full inspection and repair possible |
| Moisture Risk | Higher — moisture can trap between layers | Lower — fresh underlayment on clean deck |
| Weight | Added load on structure | Often lighter than original shingle roof |
| Warranty | May be limited or voided | Full manufacturer warranty eligible |
| Resale Value | Buyers/inspectors may question layering | Clean installation, no concerns |
The Moisture Trap Problem
This is the risk that concerns me most with overlay installations. Here's what happens:
How Moisture Gets Trapped
Asphalt shingles are semi-permeable — they allow small amounts of moisture to pass through and evaporate. When you seal metal over them, that evaporation path is eliminated. Any moisture in the shingle layer, deck, or attic space gets trapped between the impermeable metal above and the vapor retarder (if present) below. Over time, this can rot the deck without any visible exterior signs.
The fix: If you overlay, always use a batten system (1x4 furring strips at 24" on center) to create a ventilated air gap between shingles and metal panels. This lets moisture escape and prevents direct contact.
Our Recommendation
In our experience working across the Myrtle Beach area, we recommend tear-off for about 80% of residential metal roof installations. The additional cost is modest compared to the total project investment, and the peace of mind of knowing your deck is sound and your warranty is intact is worth it. The only overlay installations we feel confident about are homes with verified single-layer shingles in excellent condition, a sound deck confirmed by attic inspection, and a proper batten system for ventilation. When in doubt, tear it off. Call us at (843) 877-5539 and we'll inspect your existing roof and tell you honestly whether overlay is viable for your home.
Common Metal Roof Installation Mistakes (And How to Avoid Them)
Metal roofing is unforgiving of mistakes. Here are the most common errors and how to prevent them:
Mistake #1: Over-Driving Fasteners
The Problem: Compressing the washer too much creates a divot that pools water and eventually leaks. Over time, thermal cycling enlarges the hole.
The Fix: Fasteners should be snug—washer compressed but not mushrooming out. Use a screw gun with depth stop, not an impact driver set to full power.
Mistake #2: Under-Driving Fasteners
The Problem: Loose fasteners allow water to wick under the washer. Wind can also lift panels attached with loose screws.
The Fix: The washer's rubber gasket should be compressed about 20% against the panel—visible compression but not squeezed out.
Mistake #3: Wrong Fastener Placement
The Problem: Screwing into the rib (raised part) instead of the flat causes leaks—ribs shed water, so holes there catch runoff.
The Fix: Install exposed fasteners in the flat between ribs. Some panel profiles require rib attachment—follow manufacturer instructions exactly.
Mistake #4: Missing or Incorrect Sealant
The Problem: Using silicone instead of manufacturer-specified sealant causes adhesion failures. Missing sealant at overlaps leads to capillary leaks.
The Fix: Use only manufacturer-approved sealant (usually butyl tape or metal-roof-specific caulk). Apply in all specified locations per installation guide.
Mistake #5: Ignoring Thermal Expansion
The Problem: Rigidly fastening long panels causes "oil canning" (wavy appearance) and can eventually pull fasteners through holes.
The Fix: Use floating clips where specified. Don't crank down every fastener to maximum torque. Allow panel ends room to expand.
Mistake #6: Abrasive Cutting Damage
The Problem: Using abrasive wheels throws hot metal sparks that burn through coating, creating rust spots across the roof.
The Fix: Use electric shears, nibblers, or metal-cutting circular saw blades. If you must use a grinder, cover surrounding panels and clean all particles immediately.
Mistake #7: Poor Ventilation Planning
The Problem: Metal roofs need proper ventilation to prevent condensation underneath. Trapped moisture rots decking from below.
The Fix: Ensure adequate intake (soffit) and exhaust (ridge) ventilation. Consider adding a ventilation gap between metal and underlayment in hot climates.
DIY vs. Professional Metal Roof Installation
Should you install your metal roof yourself or hire professionals? Here's an honest comparison:
When DIY Might Work
- Small, simple structure (shed, barn, detached garage)
- Simple roof geometry—no valleys, few penetrations
- Corrugated or exposed-fastener panels (NOT standing seam)
- Experience with similar projects
- Comfortable working at heights with proper fall protection
- Willing to accept that mistakes may void warranty
- Budget for specialized tools (significant investment for one-time use)
When to Hire Professionals
- Primary residence (mistakes affect your home)
- Standing seam or snap-lock panels
- Complex roof with valleys, dormers, multiple penetrations
- Two+ stories or steep pitch
- Warranty requires certified installer
- Insurance coverage needed for installation
- Coastal or hurricane zone (code compliance critical)
DIY vs Professional Comparison
| Factor | DIY | Professional |
|---|---|---|
| Materials | Same cost — you purchase directly | Often contractor pricing (may be lower) |
| Labor | Your time (40-80+ hours) | Professional crew (2-4 days) |
| Tools | Must purchase or rent specialized equipment | Included in service |
| Material waste | 15-25% extra from mistakes | 5-10% typical waste |
| Overall cost | Lower upfront, but hidden costs add up | Higher upfront, includes warranty and expertise |
The Hidden Costs of DIY
DIY savings look attractive until you factor in: mistakes requiring material replacement, potential injury, voided warranties, difficulty selling a home with unpermitted/uninspected roofing, and time away from work. For most homeowners, professional installation is the better value.
Metal Roof Installation: What Affects Cost
Metal roof installation costs vary significantly based on your roof size, material choice, system type, and project complexity. Rather than publishing specific prices that may not reflect your situation, here is what affects your investment:
Relative Cost by Roofing Type
| Roof Type | Relative Cost | Installation Complexity |
|---|---|---|
| Corrugated Steel | Most affordable | Simplest — exposed fastener system |
| R-Panel/PBR | Budget to mid-range | Straightforward — commercial-grade panels |
| Metal Shingles | Mid-range | Moderate — interlocking system |
| Standing Seam Steel | Premium | Complex — requires specialized equipment |
| Standing Seam Aluminum | Premium+ | Complex — best for coastal salt exposure |
| Copper | Highest investment | Specialized — requires expert fabrication |
Get Accurate Pricing for Your Project
Every metal roof project is unique. Call WeatherShield at (843) 877-5539 or schedule a free inspection for a detailed, no-obligation estimate specific to your home.
Factors That Affect Cost
Increases Cost
- Complex roof geometry (dormers, valleys, hips)
- Steep pitch (7:12 or greater)
- Multiple penetrations (skylights, vents)
- Two-story or higher
- Tear-off of existing roof
- Deck repair/replacement
- Premium coating (PVDF/Kynar)
- Coastal/hurricane zone requirements
Decreases Cost
- Simple gable roof
- Low pitch (4:12 or less)
- Few penetrations
- Single-story, walkable
- Install over existing shingles
- Basic polyester coating
- Off-season installation
- Large, straightforward project
Metal Roof ROI
While metal roofs cost 2-3x more than asphalt shingles upfront, they last 2-3x longer and can reduce cooling costs 25% in hot climates. Most metal roofs pay for themselves within 15-20 years through energy savings and avoided replacement costs.
What's Included in Professional Installation
- Removal and disposal of existing roofing (if applicable)
- Inspection and repair of roof deck
- Installation of underlayment and ice/water shield
- All trim pieces (eave, gable, ridge, valley)
- Flashing at walls, penetrations, and transitions
- Metal panels and fasteners
- Pipe boots and vent covers
- Cleanup and debris removal
- Workmanship warranty (typically 2-10 years)
- Permit acquisition and final inspection
Metal Roof Installation Timeline: What to Expect
Understanding the timeline helps you plan around your metal roof installation:
Pre-Installation (1-4 Weeks Before)
- Week 1-2: Initial consultation, roof measurement, estimate
- Week 2-3: Contract signing, deposit, permit application
- Week 3-4: Material ordering (custom colors may take longer)
- Week 4: Materials arrive, scheduling confirmed
Installation Day-by-Day
Day 1: Tear-Off and Preparation
- Crew arrives, sets up safety equipment and materials
- Remove existing roofing (if applicable)
- Inspect and repair deck as needed
- Install underlayment
- Install drip edge and starter trim
Day 2-3: Panel Installation
- Install metal panels across roof surfaces
- Cut and fit panels around penetrations
- Install valley and transition flashing
- Address complex areas (dormers, skylights)
Day 3-4: Trim and Finish
- Install all trim pieces (gable, ridge)
- Install pipe boots and vent covers
- Apply sealant at all penetrations and transitions
- Touch-up paint on cut edges
- Clean up debris and final inspection
Average Timeline by Roof Size
| Roof Size | Simple Roof | Complex Roof |
|---|---|---|
| Under 1,500 sq ft | 1-2 days | 2-3 days |
| 1,500-2,500 sq ft | 2-3 days | 3-5 days |
| 2,500-4,000 sq ft | 3-4 days | 5-7 days |
| Over 4,000 sq ft | 4-5 days | 7-10+ days |
Weather Delays
Metal roofing can be installed in light rain, but heavy rain, lightning, or high winds will delay work. In Myrtle Beach, we build 1-2 buffer days into schedules during summer storm season. Standing seam installation is more weather-sensitive due to seaming requirements.
Metal Roofing in Coastal South Carolina
Installing metal roofing in Myrtle Beach and the Grand Strand requires special considerations for salt air, hurricanes, and local building codes:
Material Selection for Coastal Areas
Recommended Materials for Coastal SC
- Best: Aluminum (naturally corrosion-resistant)
- Good: Galvalume steel with PVDF coating
- Acceptable: Galvanized steel with PVDF coating (limited lifespan near ocean)
- Avoid: Standard galvanized, bare steel, budget coatings
Hurricane/Wind Resistance Requirements
South Carolina coastal building codes require metal roofing to meet specific wind ratings:
- Wind speed rating: Minimum 140 mph in most Horry County areas
- Fastener spacing: Closer spacing in high-wind zones (6-12" at edges)
- Edge metal: Continuous edge metal required, properly fastened
- Clip spacing: Standing seam clips spaced 12" maximum in wind zones
- Seam type: Mechanical-lock seams preferred over snap-lock
Installation in Wind Zones
Improperly installed metal roofing can become a dangerous projectile in hurricanes. Always hire contractors experienced with coastal installations who understand SC wind zone requirements. Ask to see their wind zone certification.
Salt Air Maintenance
Even aluminum roofing benefits from periodic maintenance in coastal areas:
- Annual rinse: Wash roof with clean water to remove salt deposits
- Bi-annual inspection: Check fasteners, sealant, and trim for corrosion
- Immediate repair: Address any scratches or coating damage promptly
- Gutter maintenance: Keep gutters clear to prevent salt water pooling
Insurance Benefits in Coastal SC
Metal roofing often qualifies for insurance discounts in hurricane-prone areas:
- Wind mitigation discount: Metal roofs meeting 140+ mph rating can qualify
- Impact resistance: Some metal roofs are Class 4 impact rated
- Fortified certification: Additional discounts with IBHS Fortified designation
- Typical savings: 10-30% reduction in wind/hurricane coverage premium
Metal Roof Maintenance: What to Inspect Over 50+ Years
One of the biggest selling points of metal roofing is its longevity — 40 to 70 years depending on the material. But "low maintenance" does not mean "no maintenance." In our experience, the homeowners who get the full lifespan out of their metal roof are the ones who do basic inspections and upkeep on a predictable schedule. Here's the maintenance plan I give every customer after we complete their installation.
Annual Inspection Checklist
Once a year — ideally in late fall before winter storms in the Grand Strand — walk around your home and check for:
- Loose or missing fasteners: Exposed-fastener panels should be checked for screws that have backed out due to thermal cycling. Look for any gaps between the screw head and the panel surface
- Sealant condition: Inspect all sealant at penetrations, flashing overlaps, and trim joints. Cracked, peeling, or separated sealant should be replaced. In coastal SC, sealant typically needs replacement every 8-12 years
- Panel condition: Look for scratches exposing bare metal, which should be touched up with manufacturer paint. Check for any dents or damage from fallen branches
- Flashing integrity: Inspect chimney flashing, pipe boots, skylight surrounds, and wall transitions. Rubber pipe boots deteriorate faster than the metal panels — plan to replace them every 15-20 years
- Ridge cap and trim: Verify ridge caps are secure, closures are intact, and no gaps have opened due to thermal movement
- Gutters and drainage: Clean gutters and downspouts. Clogged gutters back water under metal edge trim, which is a common cause of fascia rot even on a perfectly good metal roof
Seasonal Maintenance for Coastal South Carolina
| Season | Task | Why It Matters |
|---|---|---|
| Spring | Rinse roof with garden hose; clear debris from valleys | Removes pollen, salt deposits, and winter debris |
| Summer | Check attic ventilation; inspect for condensation signs | Peak heat and humidity stress ventilation systems |
| Fall | Full annual inspection; clean gutters; check fasteners | Prepares for winter storms and hurricane season tail end |
| After Major Storms | Visual inspection from ground; check for debris, dents, shifted panels | Catches wind and impact damage before leaks develop |
Long-Term Replacement Schedule
While the metal panels themselves can last 50+ years, some components have shorter lifespans. Plan for these replacements:
- Sealant and caulk (8-12 years): All sealant at joints, penetrations, and overlaps needs periodic replacement. Budget for a professional re-seal every decade
- Rubber pipe boots (15-20 years): EPDM boots degrade in UV and coastal conditions. Silicone boots last longer but still need monitoring
- Closure strips (15-20 years): Foam closure strips at ridge and eave compress and deteriorate over time, potentially allowing pests and moisture
- Exposed fastener washers (20-25 years): The EPDM washers on exposed screws dry out and crack. Plan for a fastener re-drive and washer replacement at this interval
- Touch-up paint (as needed): Address scratches and exposed metal promptly. Manufacturer touch-up paint costs very little but prevents localized corrosion
- Coating refresh (25-40 years): PVDF coatings last 30-40 years, but you may want to refresh color with a specialty metal roof coating system
Signs Your Metal Roof Needs Professional Attention
Call a Professional If You Notice:
- Water stains on ceilings or in the attic (even small ones)
- Visible rust spots on panels, especially at fastener points or cut edges
- Panels that have shifted, lifted, or appear loose after a storm
- Popping or banging sounds that are new (may indicate a clip failure)
- Gutter staining with rust-colored streaks (indicates corrosion higher on the roof)
- Any damage from fallen trees, branches, or flying debris
Schedule a Metal Roof Inspection
Not sure about the condition of your metal roof? WeatherShield offers free metal roof inspections for homeowners in the Myrtle Beach area. We'll check every fastener, every flashing point, and every sealant joint and give you an honest assessment.
Call (843) 877-5539 or schedule your free inspection online.
How to Choose a Metal Roofing Contractor
Metal roofing installation requires specialized skills different from general roofing. Here's how to find the right contractor:
Must-Have Qualifications
- Metal roofing experience: At least 5 years installing metal, not just "roofing"
- Manufacturer certification: Certified by the panel manufacturer (e.g., Sheffield Metals, McElroy, ATAS)
- Proper licensing: SC residential/commercial roofing license (verify at llr.sc.gov)
- Insurance: Workers' comp and liability coverage (get certificates)
- Local references: Metal roofs they installed 5+ years ago still performing
Questions to Ask Contractors
About Experience
- "How many metal roofs have you installed in the past year?"
- "What percentage of your business is metal vs. shingle?"
- "Can I see photos and contact info for recent metal roof clients?"
- "What manufacturer certifications do you hold?"
About the Project
- "Will you pull permits and schedule inspections?"
- "What underlayment do you use under metal?"
- "How do you handle flashing at walls and penetrations?"
- "What's your approach to ventilation?"
About Warranty
- "What workmanship warranty do you offer?"
- "Does your installation maintain the manufacturer's warranty?"
- "Who do I call if there's a problem in 5 years?"
- "Are you certified for the full manufacturer warranty?"
Red Flags to Watch For
- Pressure to sign immediately or "today-only" pricing
- Requires large deposit before materials are ordered
- No verifiable metal roofing references
- Cannot provide manufacturer certification documentation
- Quote significantly lower than competitors (cutting corners)
- Won't pull permits or says permits aren't needed
- Out-of-state contractor appearing after storms
Get Your Free Metal Roofing Consultation
WeatherShield Roofing is a certified Sheffield Metals and McElroy Metal installer with over 500 metal roof installations in the Myrtle Beach area. We specialize in standing seam aluminum roofing for coastal applications.
Call (843) 877-5539 for a free metal roofing consultation and estimate.
The Cost Comparison: Maintenance vs. Neglect
Without Maintenance
- Roof lifespan: 12-15 years
- Insurance claims often denied
- Emergency repairs cost 3x more
- Property value decreases by 5-10%
- Warranty becomes void
- Total 20-year cost: $382
With Regular Maintenance
- Roof lifespan: 25-30+ years
- Insurance claims approved
- Prevent costly emergencies
- Property value protected
- Full warranty coverage maintained
- Total 20-year cost: $8,000-10,000
Need a roofer?
Call (843) 877-5539 for a free estimateNeed Professional Help?
WeatherShield Roofing is Myrtle Beach's highest-rated roofing company with a perfect 5.0-star Google rating. We can help with any roofing need:
Frequently Asked Questions
About the Author
David Karimi
Metal Roofing Specialist & Installation Expert
David Karimi is WeatherShield Roofing's Metal Roofing Specialist with extensive experience installing standing seam, corrugated, and metal shingle roofing systems across South Carolina's coastal region. A certified GAF Certified Plus™ and Sheffield Metals installer, David has completed over 500 metal roof installations.
The Bottom Line: Your Roof, Your Choice
Every day you wait is another day closer to that emergency call no homeowner wants to make. The statistics are clear: 80% of roofs fail prematurely, and 61% of homeowners can't afford the emergency repairs that follow.
What You Get with Weather Shield Roofing:
Don't Wait Until It's Too Late
Join thousands of smart Myrtle Beach homeowners who protect their investment with regular maintenance.
Emergency? Call our 24/7 hotline: (843) 877-5539
Our Roofing Services
Serving the Grand Strand
Weather Shield Roofing proudly serves homeowners across the Grand Strand and surrounding communities. Find your local roofing experts:
Related Articles
Best Metal Roofing Materials for Hurricane Zones: Coastal SC Guide (2026)
Best metal roofing materials for hurricane zones in coastal SC. Compare aluminum, steel, copper, zinc wind ratings, salt corrosion data, and SC insurance savings. Call (843) 877-5539.
Metal Roofing Pros and Cons: Honest Guide for Coastal SC Homeowners
Discover the real pros and cons of metal roofing for coastal South Carolina homes. Covers salt air corrosion, hurricane wind ratings, SC insurance discounts, the 3-Zone Coastal Framework, and more.

Standing Seam Metal Roof: The Definitive Guide (2026)
Standing seam metal roof guide: snap-lock vs mechanical lock, steel vs aluminum panels, 50+ year lifespan, hurricane ratings up to 180 mph. Trusted Myrtle Beach installer.