How to Seal Corrugated Metal Roof Seams: Complete 11-Step Professional Guide (2025)

Shocking Industry Truth
Corrugated metal roofs are popular in Myrtle Beach for their hurricane resistance (up to 140+ MPH winds), longevity (40-70 years), and energy efficiency. But there's one critical vulnerability that causes 95% of metal roof leaks: improperly sealed seams.
In coastal South Carolina, salt air corrosion, extreme temperature swings (20°F to 95°F), hurricane-force winds, and intense UV exposure accelerate seam deterioration 40% faster than inland areas. A small gap in your seam sealant can turn into a $82 interior damage problem within one hurricane season.
This comprehensive professional guide covers the complete 11-step process to seal corrugated metal roof seams correctly—including specific product recommendations tested in coastal environments, cost breakdowns for DIY vs professional service, troubleshooting common problems, and when you should call a professional instead of attempting DIY repairs.
Ready to Protect Your Investment?
Schedule your free roof inspection today. No obligations, just peace of mind.
Quick Answer: Sealing Corrugated Metal Roof Seams
TL;DR: How to Seal Metal Roof Seams
-
•
Best Sealant for Coastal Areas: Butyl-based or polyurethane sealants (Geocel 2300, Titebond WeatherMaster, Dicor) rated for salt air and 150°F+ temperatures
-
•
Timeline: 4-8 hours for DIY (100-200 linear feet of seams), 2-4 hours for professionals
-
•
Cost: $150-$800 DIY materials vs $1,200-$3,500 professional service (includes warranty)
-
•
Best Time: Spring/Fall (55°F-85°F), low humidity, no rain forecast for 48 hours
-
•
Lifespan: 5-10 years coastal, 10-15 years inland (requires re-sealing)
⚠️ When to Call a Professional Instead of DIY
- • Roof pitch exceeds 6:12 (unsafe for DIY)
- • Seams are longer than 20 feet or hard to access
- • Existing rust or corrosion damage present
- • You've already attempted sealing and it failed
- • Your roof is over 20 years old (may need replacement)
- • Hurricane season is less than 2 months away (time-sensitive)
Emergency service available: Call (843) 877-5539 for 24/7 metal roof sealing in Myrtle Beach.
Why Sealing Corrugated Metal Roof Seams is Critical (Especially in Coastal Areas)
Corrugated metal roofing relies on overlapping panels and fasteners to create a weathertight barrier. But these connection points are vulnerable to water infiltration, especially in Myrtle Beach's challenging coastal environment.
The #1 Cause of Metal Roof Leaks: Failed Seam Sealant
According to the Metal Roofing Alliance, 95% of metal roof leaks occur at seams, fasteners, and penetrations—not from panel failure. Here's why seams fail faster in coastal areas:
Coastal Accelerated Deterioration Factors
| Factor | Impact on Seams | Myrtle Beach Severity |
|---|---|---|
| Salt Air Corrosion | Degrades sealant elasticity, causes metal corrosion around seams | High (0.5-3 miles from ocean) |
| UV Exposure | Breaks down sealant molecular structure, causes cracking | Very High (coastal sun intensity) |
| Temperature Cycles | Metal expands/contracts, stresses sealant joints | High (20°F-140°F roof surface) |
| Hurricane Winds | Lifts panels, tests seam adhesion, drives water under seams | Extreme (80-140+ MPH storms) |
| High Humidity | Promotes mold, accelerates rust at seam fasteners | High (avg 75% humidity) |
What Happens When Seams Fail
Immediate Damage (Weeks 1-4)
- • Water infiltration during rain
- • Rust staining on metal panels
- • Wet insulation (loses R-value)
- • Ceiling water stains
Long-Term Damage (Months 1-12)
- • Structural wood rot ($3,000-$8,000 repair)
- • Mold growth ($5,000-$15,000 remediation)
- • Rust perforation of metal panels
- • Interior drywall/ceiling damage
💡 Real Case Study: Myrtle Beach Metal Roof Seam Failure
In 2024, a North Myrtle Beach homeowner delayed re-sealing their 8-year-old corrugated metal roof. During Hurricane Debby, wind-driven rain penetrated failed seams, causing:
- • $12,000 in interior damage (ceiling, walls, flooring)
- • $4,500 mold remediation
- • $2,800 for emergency roof sealing and tarp service
- • Total cost: $19,300 (insurance covered $8,000 after deductible)
Prevention cost would have been: $1,800 professional sealing or $400 DIY materials.
Tools and Materials You'll Need (Complete Checklist)
Professional-grade materials are critical for coastal applications. Cheap sealants fail within 1-2 years in Myrtle Beach's harsh environment.
Recommended Sealants for Coastal Metal Roofs (Tested)
| Product | Type | Coastal Rating | Price |
|---|---|---|---|
| Geocel 2300 Pro Flex RV (Best Overall) | Polyurethane | Excellent | $18-$22/tube |
| Titebond WeatherMaster Metal Roof Sealant | Polyether | Excellent | $15-$19/tube |
| Dicor EPDM Lap Sealant | Butyl rubber | Very Good | $12-$16/tube |
| Rust-Oleum LeakSeal Flexible Rubber | Rubber | Good | $10-$14/can |
| Generic Silicone Caulk (Avoid) | Silicone | Poor | $4-$8/tube |
⚠️ Why NOT to Use Silicone Sealant
Many DIYers use generic silicone caulk because it's cheap and widely available. This is a critical mistake for metal roofs.
- • Poor adhesion: Won't bond properly to metal surfaces (especially painted/coated metal)
- • UV degradation: Breaks down within 1-2 years under intense coastal sun
- • Temperature failure: Becomes brittle in cold, melts in extreme heat
- • Can't be painted: If you need to coat or paint later, silicone prevents adhesion
Use polyurethane or butyl-based sealants specifically rated for metal roofing.
Complete Materials List
Sealant & Application
- ☑ Metal roof sealant (6-12 tubes for avg 1,500 sq ft roof)
- ☑ Caulking gun (heavy-duty, smooth trigger)
- ☑ Putty knife or sealant spreader tool
- ☑ Backer rod (for gaps wider than 1/4")
- ☑ Solvent/mineral spirits (for cleanup)
Cleaning & Prep
- ☑ Wire brush (remove rust/debris)
- ☑ TSP cleaner or degreaser
- ☑ Shop rags/microfiber cloths
- ☑ Rust converter primer (if rust present)
- ☑ Metal roof primer (for better adhesion)
Safety Equipment (CRITICAL)
- ☑ Fall protection harness & anchor point
- ☑ Non-slip rubber-soled boots
- ☑ Safety goggles
- ☑ Work gloves (chemical-resistant)
- ☑ Ladder stabilizer/standoff
Optional (Recommended)
- ☑ Cordless drill + wire cup brush attachment
- ☑ Infrared thermometer (check surface temp)
- ☑ Roof anchors (permanent fall protection)
- ☑ Sealant gun with flow control
- ☑ UV-resistant seam tape (backup layer)
Cost Breakdown: DIY vs Professional
| Item | DIY Cost | Professional Cost |
|---|---|---|
| Sealant (8 tubes) | $120-$180 | Included |
| Tools & supplies | $30-$120 | Included |
| Safety equipment | $80-$300 | Included |
| Labor (your time: 6-8 hrs) | Free (your labor) | $800-$1,800 |
| Warranty | None | 2-5 years workmanship |
| Total | $230-$600 | $1,200-$3,500 |
Professional service includes: Full roof inspection, rust repair, proper surface prep, warranty on workmanship, insurance coverage, and completion in 2-4 hours instead of 6-8+ hours DIY.
Complete 11-Step Professional Process to Seal Metal Roof Seams
Follow this proven process used by professional metal roofing contractors in coastal South Carolina. Skipping steps or rushing leads to sealing failure within 1-2 years.
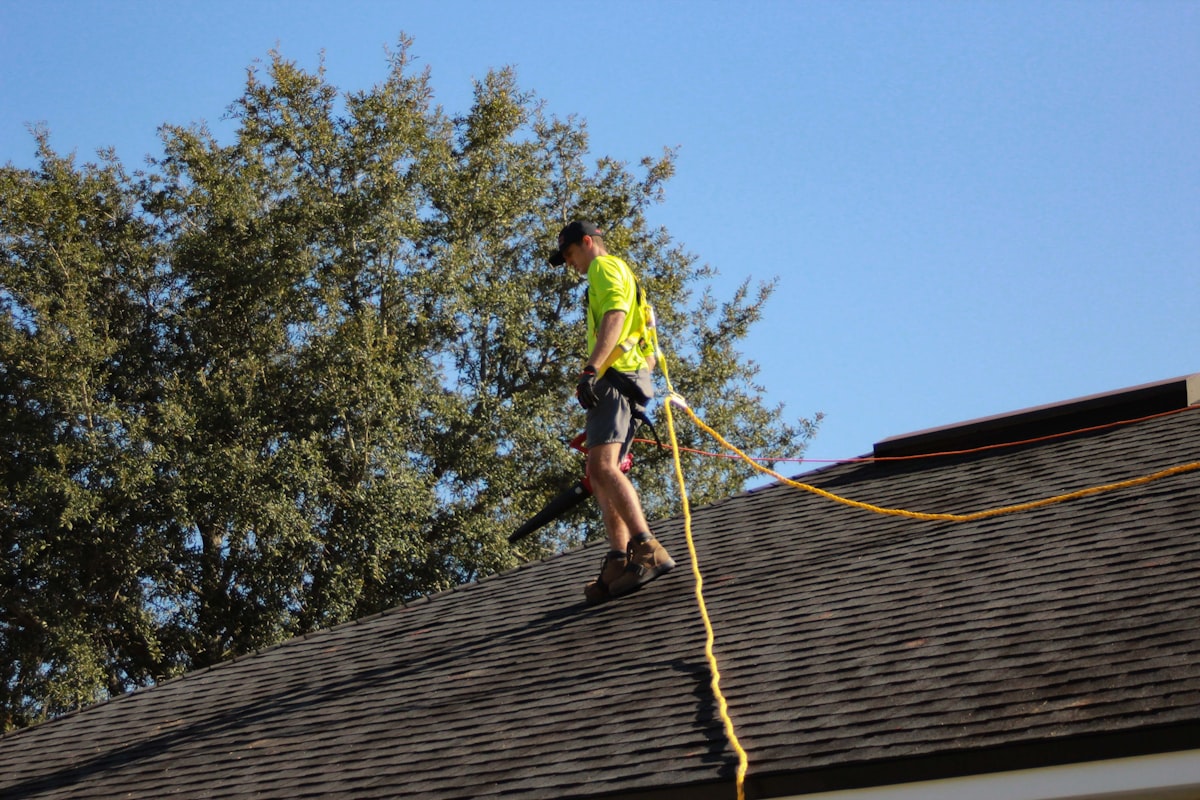
Step 1: Safety First - Set Up Fall Protection
Why this matters: Falls from roofs are the #1 cause of construction deaths. Corrugated metal is especially slippery when wet or dewy.
- • Install roof anchors or use chimney anchor strap system
- • Wear full-body harness connected to lifeline
- • Use ladder standoff to prevent gutter damage
- • Work with a partner (someone on ground level)
- • Check weather: NO work if rain, high winds (15+ mph), or ice predicted
⚠️ If your roof pitch exceeds 6:12 or is over 20 feet high, hire a professional. The risk isn't worth the DIY savings.
Step 2: Inspect All Seams and Identify Problem Areas
Walk the entire roof and document every seam that needs attention. Look for:
- • Cracked or missing sealant: Indicates UV degradation or failed application
- • Rust stains or corrosion: Water has been penetrating (needs rust treatment)
- • Lifted or separated panels: Wind damage or thermal movement
- • Gaps wider than 1/4": Require backer rod before sealing
- • Standing water pools: Drainage issue (needs addressing before sealing)
Pro tip: Take photos with your phone and mark problem areas with chalk or removable tape for reference.
Step 3: Remove Old, Failed Sealant Completely
New sealant won't bond properly over old, degraded material. This is the most time-consuming step but critical for success.
- • Use a putty knife or 5-in-1 tool to scrape away old caulk
- • For stubborn sealant, apply mineral spirits and let sit 10-15 minutes
- • Use wire brush to remove residue from metal surface
- • For large areas, use drill with wire cup brush attachment (faster)
- • Clean out seams completely—any residue prevents new sealant adhesion
Common mistake: Applying new sealant over old. This creates a weak bond that fails within 1-2 seasons. Remove everything down to bare metal.
Step 4: Address Rust and Corrosion (Critical for Coastal Roofs)
Myrtle Beach's salt air accelerates rust at seam fasteners and edges. Sealing over rust guarantees failure.
- • Light surface rust: Remove with wire brush, then apply rust converter primer
- • Moderate rust: Use angle grinder with wire wheel to remove, then prime
- • Severe rust (holes or deep pitting): Panel replacement required (not DIY-able with sealant)
- • Apply rust-inhibiting metal primer to bare areas (let dry per manufacturer specs)
- • For fastener rust: Consider replacing rusted screws with stainless steel or coated fasteners
Product recommendation: Rust-Oleum Rust Reformer converts rust to stable surface (apply before sealant).
Step 5: Clean and Degrease All Seam Surfaces
Sealant requires a clean, dry surface for proper adhesion. Coastal roofs accumulate salt residue, algae, and industrial pollutants.
- • Mix TSP (trisodium phosphate) or metal roof cleaner per label directions
- • Scrub seam areas with stiff brush and cleaner solution
- • For grease/oil contamination: Use degreaser (Simple Green, Purple Power)
- • Rinse thoroughly with clean water (garden hose)
- • Let dry completely—at least 24 hours in humid Myrtle Beach climate
Humidity check: Use an infrared thermometer to verify surface temp is at least 10°F above dew point before applying sealant. If surface is too cool, moisture will condense and prevent adhesion.
Step 6: Apply Metal Roof Primer (Highly Recommended)
While not always required, primer significantly improves sealant adhesion and longevity—especially on painted or coated metal.
- • Choose primer compatible with your sealant (check manufacturer specs)
- • Apply thin, even coat along seam areas using brush or foam applicator
- • Let dry per label (typically 30 minutes to 2 hours)
- • Don't skip this on Kynar/PVDF-coated metal—primer is essential
Recommended: Titebond Metal Roof Primer or Geocel Pro-Prime (both tested for coastal applications).
Step 7: Install Backer Rod for Wide Gaps (If Needed)
Gaps wider than 1/4" require backer rod to prevent sealant from sagging and to improve adhesion.
- • Measure gap width and select backer rod 1/8" larger than gap
- • Push backer rod into seam using putty knife or blunt tool
- • Rod should sit 1/4" to 1/2" below surface (not flush)
- • Creates proper sealant depth and prevents "three-sided adhesion" (causes failure)
Step 8: Apply Sealant Using Proper Technique
This is the critical step where most DIY failures occur. Follow these professional techniques:
Application Method
- • Temperature window: Apply when surface temp is 55°F-90°F (check with IR thermometer)
- • Cut nozzle angle: 45-degree angle, opening sized to match seam width
- • Bead size: 1/4" to 3/8" bead for most corrugated seams
- • Application speed: Steady, consistent pressure and movement (not too fast or slow)
- • Overlap: If stopping mid-seam, create 1" overlap when resuming
Sealing Pattern for Corrugated Roofs
- Horizontal seams (panel overlaps): Apply continuous bead along top and bottom edges of overlap
- Vertical seams (end laps): Seal both sides where panels meet
- Fastener heads: Apply small dab over each exposed fastener
- Ridge caps: Seal where ridge cap meets panels on both sides
- Flashing transitions: Seal where metal meets flashing at walls, chimneys, vents
Pro technique: Work in 10-15 foot sections. Apply sealant, then immediately tool/smooth (Step 9) before moving to next section. Don't apply sealant to entire roof then try to smooth—it will skin over and won't tool properly.
Step 9: Tool and Smooth Sealant Immediately
Tooling creates proper seam adhesion and prevents water from wicking under sealant edges.
- • Within 5-10 minutes of application (before skinning over)
- • Use plastic spoon, popsicle stick, or professional sealant tool
- • Smooth sealant into seam with firm, consistent pressure
- • Ensure sealant contacts both sides of seam (critical for waterproofing)
- • Remove excess sealant with rag dampened in mineral spirits
- • Create slight concave profile (edges higher than center)—sheds water better
Don't use your finger to smooth—body oils can contaminate sealant and reduce adhesion.
Step 10: Inspect and Touch Up Any Gaps
Walk the entire roof once more and check your work carefully.
- • Look for voids, air bubbles, or thin spots in sealant
- • Check that all seams have continuous bead coverage
- • Verify sealant adheres to both sides of every seam
- • Touch up any missed fasteners or transition points
- • Look from ground level—sometimes gaps are more visible from different angles
Step 11: Allow Proper Cure Time Before Rain Exposure
This is where many coastal projects fail—unexpected afternoon thunderstorms during cure.
- • Minimum cure time: 24-48 hours before rain (check product label)
- • Full cure time: 7-14 days for maximum strength
- • Temperature matters: Cure time increases in cold weather, humidity slows cure
- • Check 48-hour weather forecast before starting project
- • If rain is forecast within 48 hours, delay project or use fast-cure sealant
Myrtle Beach afternoon thunderstorms: Summer months (June-September) have 40-50% chance of afternoon rain. Best times to seal:
- • Spring (March-May): Moderate temps, lower rain probability
- • Fall (October-November): Best weather window before winter
- • Avoid: Mid-summer (thunderstorm risk) and winter (low temps affect cure)
✅ Project Complete: Expected Lifespan
If you followed all 11 steps correctly with quality materials:
- • Coastal environment (Myrtle Beach): 5-8 years before re-sealing needed
- • Inland South Carolina: 8-12 years
- • Signs it's time to re-seal: Sealant cracking, shrinkage, discoloration, or visible gaps
Set a calendar reminder to inspect seams annually and budget for re-sealing every 5-7 years as part of preventive maintenance.
Troubleshooting Common Problems (And How to Fix Them)
Even with careful application, problems can occur. Here's how to identify and fix common sealing issues.
Problem: Sealant Won't Stick or Peels Away
Causes:
- • Surface not properly cleaned (grease, salt residue, algae)
- • Applied over old sealant residue
- • Incompatible primer or wrong sealant type
- • Surface too cold or damp (condensation)
Fix:
- 1. Remove failed sealant completely (back to bare metal)
- 2. Clean again with TSP/degreaser, rinse thoroughly, dry 24+ hours
- 3. Apply compatible metal roof primer
- 4. Reapply sealant when surface temp is 60°F+ and no dew present
Problem: Sealant Cracking or Shrinking Within First Year
Causes:
- • Cheap sealant not rated for temperature extremes
- • Applied too thin (less than 1/4" bead)
- • Three-sided adhesion (sealant in deep gap without backer rod)
- • Excessive UV exposure (south-facing slopes)
Fix:
- 1. Remove cracked sealant
- 2. For gaps over 1/4", install backer rod first
- 3. Use high-quality polyurethane sealant (Geocel 2300 or Titebond WeatherMaster)
- 4. Apply proper bead thickness (3/8" for coastal exposure)
Problem: Still Leaking After Sealing
Causes:
- • Missed a seam or transition point
- • Leak is coming from different location (flashing, penetration, fastener)
- • Sealant didn't cure before rain exposure
- • Structural problem (panel separation, damaged decking)
Fix:
- 1. During rain, trace leak from interior to find actual entry point
- 2. Check all flashing, pipe boots, ridge vents (90% of "seam leaks" are actually penetrations)
- 3. Look for water traveling along fastener threads
- 4. If leak persists after thorough inspection, call professional—may be hidden structural issue
Problem: Sealant Color Changed or Turned Black
Causes:
- • Mold/mildew growth on sealant surface (high humidity areas)
- • UV degradation (sealant turning yellow/brown)
- • Industrial fallout or air pollution deposits
Fix:
- • If still sealing properly: Clean with bleach solution (1:4 bleach:water), rinse well
- • If degraded/cracking: Remove and replace with UV-resistant sealant
- • Prevention: Use sealants with mold/mildew inhibitors for humid coastal areas
Problem: Sealant Softens or Melts in Summer Heat
Causes:
- • Wrong sealant type (not rated for metal roof temperatures)
- • Dark-colored roof reaches 160°F+ in summer sun
- • Sealant not fully cured before hot weather exposure
Fix:
- 1. Remove softened sealant when temperatures cool (fall/winter)
- 2. Use high-temperature sealant rated to 180°F+ (Geocel 2300, Dicor EPDM)
- 3. Consider lighter roof color if replacing panels (reduces heat buildup)
Problem: Rust Bleeding Through New Sealant
Causes:
- • Active rust not treated before sealing
- • Water trapped under sealant continuing corrosion
- • Fastener rust migrating outward
Fix:
- 1. Remove sealant from affected areas
- 2. Grind/sand rust down to bare metal or solid surface
- 3. Apply rust converter, let cure 24 hours
- 4. Prime with rust-inhibiting metal primer
- 5. Reseal once primer is fully cured
- 6. If rust is extensive, panel replacement may be more cost-effective
When to Stop DIY Repairs and Call a Professional
If you've attempted sealing twice and still have leaks, or if you encounter any of these situations:
- • Extensive rust requiring panel replacement
- • Structural damage (sagging panels, separated seams, loose fasteners)
- • Leaks from multiple locations you can't identify
- • Standing water indicating drainage/slope problems
- • Roof age over 25-30 years (replacement may be more cost-effective)
Professional diagnosis is free: Call (843) 877-5539 for expert assessment and honest recommendations.
DIY vs Professional Metal Roof Sealing: Making the Right Choice
While sealing corrugated metal roof seams is achievable for confident DIYers, certain situations demand professional expertise—especially in Myrtle Beach's challenging coastal environment.
When DIY Makes Sense
✅ Good DIY Candidates
- • Small project: Single building, shed, or garage (under 1,000 sq ft)
- • Low pitch: 3:12 or less (safer to walk on)
- • Good roof access: Single-story, easy ladder placement
- • Minor seam maintenance: No rust, structural issues, or major gaps
- • You have experience: Comfortable working at heights with proper safety gear
- • Time available: Can dedicate full weekend with good weather forecast
- • Roof under 15 years old: In good condition overall
Expected DIY results: With proper materials and technique, 5-8 year sealing lifespan in coastal areas.
When You Should Hire a Professional
⛔ Situations Requiring Professional Service
1. Safety Concerns
- • Roof pitch steeper than 6:12 (extremely dangerous without professional equipment)
- • Two-story or higher buildings (20+ feet fall risk)
- • Brittle or damaged panels that could break underfoot
- • High winds common in your area (coastal exposure)
2. Technical Complexity
- • Extensive rust requiring panel replacement or structural repair
- • Standing seam metal roofs (require different techniques than corrugated)
- • Multiple roof penetrations (skylights, vents, HVAC equipment)
- • Previous DIY repairs that failed (indicates underlying problem)
- • Commercial building or multi-unit property
3. Time and Weather Constraints
- • Hurricane season approaching (June-November) and urgent repair needed
- • Active leaks causing interior damage (need immediate waterproofing)
- • Can't dedicate full weekend with guaranteed good weather
- • Project too large to complete in 8 hours (insurance/warranty concerns)
4. Financial and Warranty Considerations
- • Home under warranty or recent roofing work (DIY may void warranty)
- • Preparing for home sale (buyers want professional certification)
- • Insurance claim involvement (requires licensed contractor documentation)
- • Want transferable warranty for future buyers
What Professional Service Includes (Value Beyond Just Labor)
| Service Component | Professional Value |
|---|---|
| Full Roof Inspection | Identifies hidden problems (rust, structural issues, drainage) before they cause expensive damage |
| Proper Equipment | Commercial-grade safety gear, scaffolding, professional sealant guns, surface prep tools |
| Expertise | years of experience, knows which products work in coastal salt air, proper application techniques |
| Warranty | 2-5 year workmanship warranty (vs no warranty on DIY). If it fails, we fix it free. |
| Insurance | $2M liability coverage. If we damage your property, we're covered. DIY accidents = your problem. |
| Speed | 2-4 hours completion vs 6-8+ hours DIY. Back to waterproof same day. |
| Documentation | Photos, materials used, warranty certificate (valuable for insurance claims and home sales) |
Real Cost Comparison Over 10 Years
Many homeowners focus only on initial cost. Here's the true 10-year cost accounting for re-sealing frequency:
DIY Scenario (10 Years)
- • Initial sealing: $450 (materials + safety gear)
- • Re-seal at Year 5: $350 (materials)
- • Re-seal at Year 8: $350 (materials)
- • Your labor: 18 hours total @ $0 (your time)
- Total 10-year cost: $1,150
Professional Scenario (10 Years)
- • Initial sealing: $2,200 (full service + warranty)
- • Re-seal at Year 7: $1,800 (longer-lasting pro application)
- • Warranty coverage: Years 1-7 (free fixes if issues)
- • Your labor: 0 hours (your time is free)
- Total 10-year cost: $4,000
The $2,850 difference buys you: 18 hours of your time back, zero fall risk, warranty protection, longer-lasting results (7 years vs 5 years between re-sealing), and professional documentation for insurance/resale.
Value your time at $50/hr? The 18 hours you save = $900. Real cost difference drops to $1,950 over 10 years.
WeatherShield's Honest Recommendation
We're happy to help you regardless of your choice. Here's our unbiased advice:
- • DIY if: You're confident, have proper safety gear, roof is low-pitch and accessible, project is small, and you value learning the skill
- • Hire us if: You value your time, safety concerns exist, project is large/complex, you want warranty protection, or you're preparing for home sale
Free consultation available: Call (843) 877-5539 and we'll honestly tell you if your project is DIY-able or requires professional service. We turn down work all the time when DIY is the smarter choice.
WeatherShield Metal Roof Sealing Service
Our professional metal roof sealing service for Myrtle Beach coastal homes includes:
-
✓
Free inspection and estimate – We identify all seam issues, rust, and structural concerns before quoting
-
✓
Complete surface preparation – Old sealant removal, rust treatment, cleaning, priming
-
✓
Premium coastal-rated materials – Geocel, Titebond, or Dicor sealants proven in salt-air environments
-
✓
Professional application – Proper bead sizing, tooling, and inspection by certified metal roofing specialists
-
✓
Fastener sealing – Every exposed screw head sealed to prevent future rust
-
✓
Flashing and transition sealing – Ridge caps, wall flashings, penetrations (often missed in DIY)
-
✓
3-year workmanship warranty – If sealing fails, we re-do it free (materials and labor)
-
✓
Photo documentation – Before/after photos for your records and insurance
-
✓
$2M liability insurance – You're protected if anything goes wrong
Ready to Protect Your Metal Roof?
Free inspection, honest assessment, and competitive pricing for Myrtle Beach homeowners.
Or request a free inspection online
24/7 emergency service available • Licensed & insured • 5.0★ Google rating (82 reviews)
The Cost Comparison: Maintenance vs. Neglect
Without Maintenance
- Roof lifespan: 12-15 years
- Insurance claims often denied
- Emergency repairs cost 3x more
- Property value decreases by 5-10%
- Warranty becomes void
- Total 20-year cost: $382
With Regular Maintenance
- Roof lifespan: 25-30+ years
- Insurance claims approved
- Prevent costly emergencies
- Property value protected
- Full warranty coverage maintained
- Total 20-year cost: $8,000-10,000
Need a roofer?
Call (843) 877-5539 for a free estimateNeed Professional Help?
WeatherShield Roofing is Myrtle Beach's highest-rated roofing company with a perfect 5.0-star Google rating. We can help with any roofing need:
Frequently Asked Questions
About the Author
David Karimi
Metal Roofing Specialist & Coastal Waterproofing Expert
David Karimi is WeatherShield Roofing's Metal Roofing Specialist with extensive experience installing and maintaining metal roofing systems in coastal South Carolina. As a GAF Certified Plus™ contractor and certified metal roofing installer, David has sealed over 500 corrugated metal roofs and specializes in coastal waterproofing solutions for Myrtle Beach's challenging salt-air environment.
The Bottom Line: Your Roof, Your Choice
Every day you wait is another day closer to that emergency call no homeowner wants to make. The statistics are clear: 80% of roofs fail prematurely, and 61% of homeowners can't afford the emergency repairs that follow.
What You Get with Weather Shield Roofing:
Don't Wait Until It's Too Late
Join thousands of smart Myrtle Beach homeowners who protect their investment with regular maintenance.
Emergency? Call our 24/7 hotline: (843) 877-5539
Our Roofing Services
Serving the Grand Strand
Weather Shield Roofing proudly serves homeowners across the Grand Strand and surrounding communities. Find your local roofing experts:
Related Articles
Best Metal Roofing Materials for Hurricane Zones: Coastal SC Guide (2026)
Best metal roofing materials for hurricane zones in coastal SC. Compare aluminum, steel, copper, zinc wind ratings, salt corrosion data, and SC insurance savings. Call (843) 877-5539.
Metal Roofing Pros and Cons: Honest Guide for Coastal SC Homeowners
Discover the real pros and cons of metal roofing for coastal South Carolina homes. Covers salt air corrosion, hurricane wind ratings, SC insurance discounts, the 3-Zone Coastal Framework, and more.

Standing Seam Metal Roof: The Definitive Guide (2026)
Standing seam metal roof guide: snap-lock vs mechanical lock, steel vs aluminum panels, 50+ year lifespan, hurricane ratings up to 180 mph. Trusted Myrtle Beach installer.